Pages

Monday, September 5, 2011

PBJ's my way

I can't believe I am soon to the a parent of a school age child. Where has that gone? On one hand every day has seemed to last a year, and on the other it seems like yesterday that I first smelt that downy head and watched two little beady eyes start to take a look at what the world had to offer.


Like most parents, my emotions are completely mixed. I am carried along by my daughters' enthusiasm and longing for the next stage of her exciting life. I am also terrified of losing her, of losing these precious times, of taking the next step away from the intoxicating early years of parenting.
On a practical level I have no idea how to fill in the school dinners forms or which door to drop her off at for her first morning.


What everyone seems to agree on is that she will come home hungry, horrible and tired. I've stocked up on quick after school snacks, but I will also be passing some of these her way. Actually, she usually likes making them herself, but maybe even that will be too much of an effort in the weeks to come after a day in her new classroom. I shall make them myself then, and that should avoid the jam ending up on the floor and the peanut butter in her hair.


These are a great, nutritious snack based on the American classic, a PBJ (peanut butter and jelly sandwich.) There are only 3 ingredients, so make sure you get good quality. Oatcakes ( I go for Nairns Organics) peanut butter (Wholefoods Smooth is delicious and doesn't have any added sugar) and jam (personally I am a sucker for St Dalfours Raspberry and Pomegranate which uses grape juice as a sweetner.) Thats it. We usually have them as an 'open sandwich' but they are equally good with another oatcake plonked on top in true sandwich style.
 Make these, and you won't be able to resist having one yourself. In one delicious, crunchy bite, your child will be having some slow burning carbs, some protein and a little bit of their 5 a day. That might help to sweeten up the grumpy thing formerly known as your child.

Wednesday, May 11, 2011

Early Sunday Morning

Sunday started early in our house this week. My smallest one wasn't up with the larks, but with the wood pigeons. Half past five is not the time that I like to start my day, even more so on a Sunday.. Cooking sometimes eases me through those long hours before anyone else in the world is up, and so we made a cake.
In my Riverford Organic Veg Box this week was a recipe from their new cook book, Everyday And Sunday, for a Rhubarb and Cinnamon cake. I'd been looking longingly at the recipe all week, now was my chance.
                                   
Rhubarb isn't popular with my children. They pick it out of crumble, and eat the crust of a pie, silently ignoring the fruit underneath. They do, however, like waving the spears about like swords. I have been determined to try and find something containing rhubarb that they will eat, and I hoped that this cake would be the answer.

The cake is a joy to make. No need to stew the rhubarb, you just cut it into small chunks and add it into the mix. Stirring in the orange, creme friache and cinnamon creates an intoxicating smell and I could have eaten the mixture raw.
  
So did they eat it? Well no, not really. They picked at it for a while but I can't say that they woolfed it down. They had a lot of fun making it and waiting for it to come out of the oven, but they didn't take to the tangy taste. Maybe some things are best left for us adults and we certainly weren't complaining about eating their left overs. It is the most delicious cake I've had in a long time and makes a change from never-ending crumble.  I actually made 2 cakes, one small and one medium size as I didn't think we would get through the large one that the recipe calls for. The smaller cake took 30 minutes, the larger one took 40minutes.

Riverford Organics' Rhubarb and Cinnamon Cake (from Everyday and Sunday)
Serves 10 - 12
60g unsalted butter, softened, pluse more for the tin
380g soft brown sugar
3 large eggs
a few drops of vanilla extract
a pinch of salt
zest of 2 oranges
300g self raising flour
1 tsp bicarbonate of soda
1 tsp ground cinnamon
250ml creme fraiche
450g rhubarb cut into 1cm pieces

for the topping
60g brown sugar
1 tsp ground cinnamon

Preheat the oven to 160C

Butter a 24cm springform cake tin and line with baking parchment

Cream the butter and sugar together.

Add the eggs, vanilla, salt and orange zest

Sift the flour, bicarbonate of sods and cinnamon into the mixture, and fold through the creme fraiche and rhubarb.

Pour into the cake tin and sprinkle with the sugar and cinnamon for the topping.

Bake in the oven for 40-50 minutes, until a skewer inserted in the centre comes out clean  
Serve warm or cold, with custard or cream.

The lovely folk at Riverford Organic have given me a copy of their new book, 'Everyday & Sunday recipes from Riverford Farm' which was published on May 2nd. Leave me a comment with your name and the girls and I will draw a name from a hat on Monday 16th and I will send the book to the winner.


Friday, March 4, 2011

Friday Night Fever

Many moons ago (well about 10 years anyway), Friday 5pm meant drinks at our desks in the PR firm I worked for, before launching ourselves out into the night and all the promise of a London weekend.

As I write I can almost hear lipstick being slicked on lips, hair being put up, pulled out, put up again, and drinks being clinked as the nations' young come together to celebrate the end of the working week and the down time that is ahead of them.

How life has changed.

Friday 5pm, chez moi, often means tired children, tired Mummy, and the thought of getting up at the same time tomorrow and doing it all over again. Now don't get me wrong, I adore my children and I wouldn't want it any other way, but I do sometimes feel like I am caught in my own, rather messy, groundhog day.

This Friday to shake things up a bit, and inspired by my friend Ceri who throws a regular Friday Night Disco, when she, her husband and children enjoy a bit of a boogie before bed - I decided to have a pizza night with the girls.


In the spirit of Ceri's disco, we played some cheesy 80's hits and the odd Disney classic to please the younger cooks, whilst creating our masterpieces. I recently purchased some mini victoria sponge tins for making pizzas in (inspired by a trip to Pizza Express when I watched the girls' pizzas being made in something which, it transpires, is called a black iron pizza pan.) The new tins worked brilliantly, the girls punched down their dough into them and the end product came out looking like pizzas, not like road kill, which is often the case when making free form pizzas with young children.


And so, children happy, fed and in bed, I'm feeling a bit like it really is Friday night,  and I can settle down with a glass of something that isn't Ribena and wait for my poor tired husband to come home (actually not that poor and tired as he was away covering a story last night and got to stay in a Hotel Du Vin. No sympathy really.) Happy weekend all.


Little Pizzas

For 4 small pizzas (about 6 inch diameter)

250g white flour (strong white bread flour is best)
1/2 of a 7g sachet of fast action yeast
1/4 pint warm water
1 tsp caster sugar
1 tsp salt


1. Weigh out the flour together and get your child to tip it into a large bowl.
2. Add the salt to the flour.
3. Measure out hot water from the tap.
4. Get your child to tip the yeast into the water, stir.
5. Now let them do the same with the sugar into the water, and stir.
6. Now get your child to 'dig' a well in the middle of the flour, and then pour in the yeast/water mix, and show them how to stir it all together.
7. Bring the dough into a ball, and then let your child knead it for a while, until they get bored (mine lasted about 2 minutes and then wanted to go and watch Octonoughts.)
8. Finish off the kneading yourself, or put it into a mixer with a dough hook and let it do the work for you. About 10 minutes should do the job.

Now leave the dough to rise for 20 minutes somewhere warmish.

Meanwhile, prepare your toppings.


We used


which is much too good to use for pizza really, its the most delicious mozarella I have ever tasted outside of Italy 


And a selection of these.
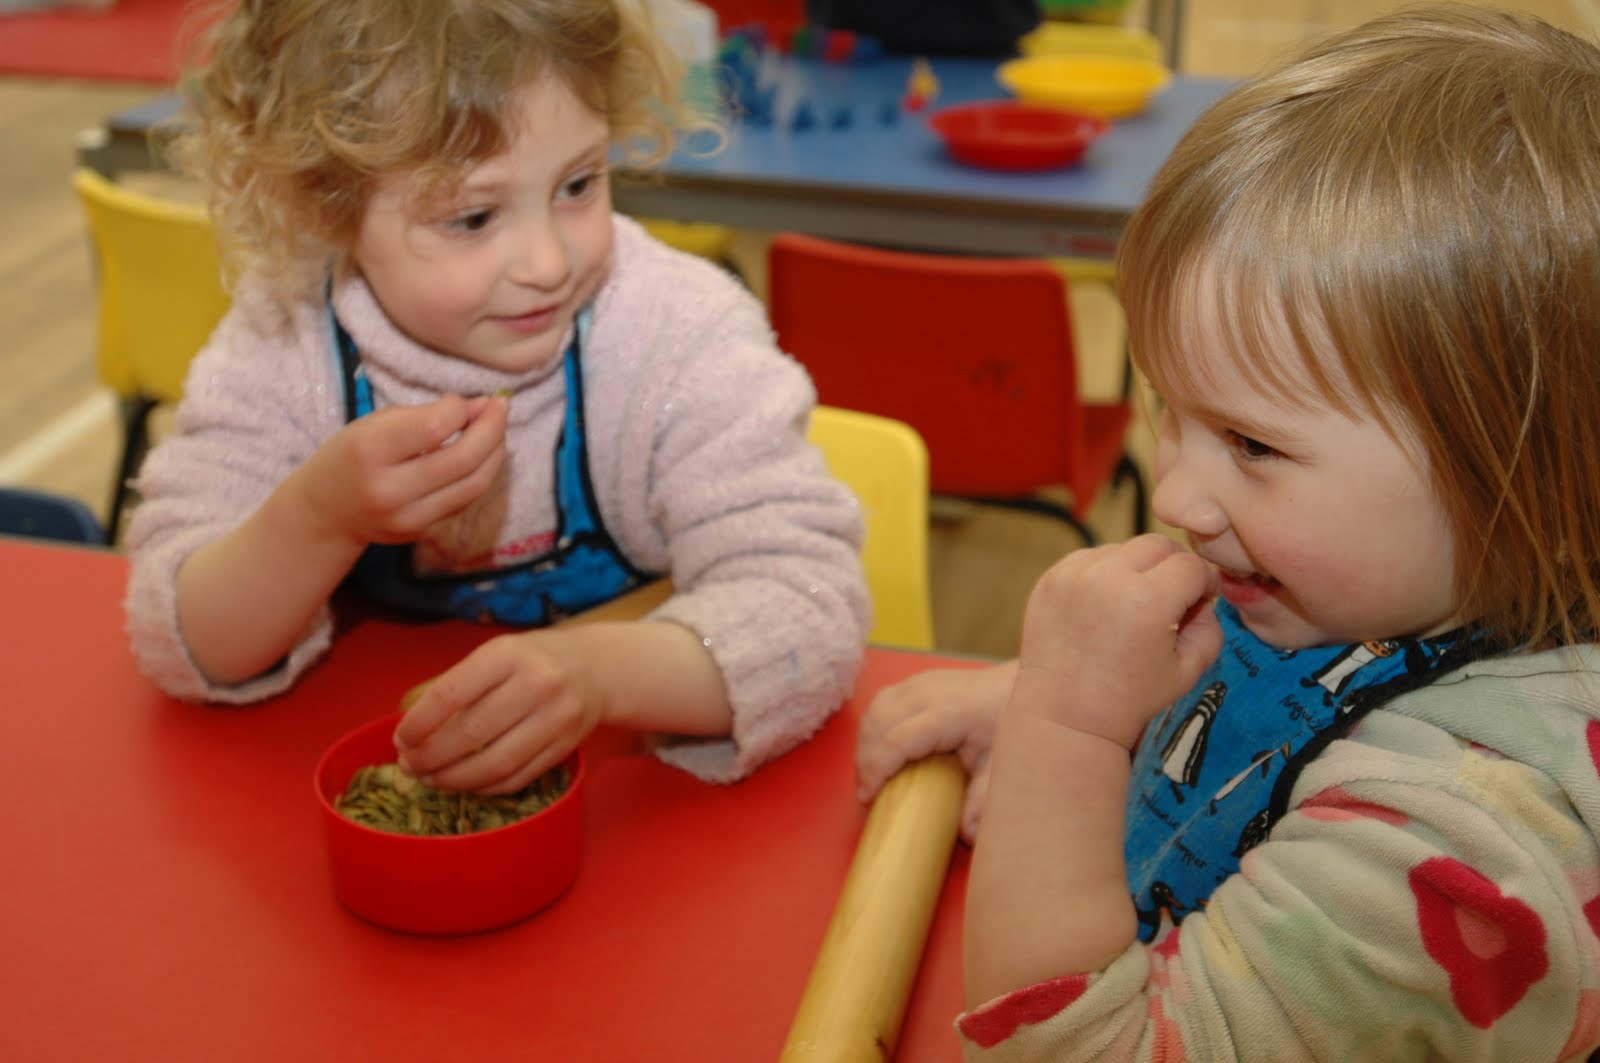
The children only topped their pizzas with olives, and couldn't be tempted to try sundried tomatoes and artichokes.

You know what you and yours like, so just make sure you've got lots of different bits for them to choose from.


I make my own pizza sauce by frying 1 clove of garlic over a very low heat, then adding a tin of chopped tomatoes, and some basil, and simmering for about 20 minutes, then blitzing with a hand held mixer. You only want to use the merest scraping of tomato sauce on your pizzas, so save the rest for pasta, or for topping chicken or fish.

Once you have assembled your pizzas, cook at 220C for about 10 minutes.


Thursday, February 3, 2011

Of childhood things

Some childhood rituals are timeless.  There are things that we can be sure that our parents did and that our great grandchildren will be doing many years from now. Like throwing a stick into a river and watching it float out from under a bridge, falling down and scraping a knee, or squirming whilst a fussing mother smears your face clean with a hankie.

And amongst these rituals, in fact jostling for a top position in my opinion, is making chocolate crispie cakes. Stirring the velvety chocolate into the crunchy cereal and bringing a wooden spoon up to your mouth for a stolen lick is a rite of passage. I cannot see one of these knobbly brown creations without getting hit by a heavy dose of nostalgia.

I updated the classic slightly when I cooked these with my children this week, although I can see that some might think this to be messing with a masterpiece!  My version is ever so slightly more nutritious. I used one of our favourites, peanut butter and some healthier 'sprinkles', sesame seeds.


I think about half of the mixture escaped uneaten ...


so we were able to make lots of little crispy cakes.


1. Melt 150g peanut butter (I used the Whole Earth Crunchy which doesn't have any added sugar) with 150g of good quality chocolate

2. Allow to cool then let your child stir in 150g of Bran Flakes and 25g sesame seeds (some children can have a sesame allergy so leave these out if you are not sure)

3.  Help them to spoon into cake cases and put into the fridge to harden.

4.  Eat and enjoy!


Thursday, January 27, 2011

Playdough or pasta?

These long winter afternoons are the perfect excuse to get back to my much-ignored blog. The girls and I have been making just as much mess in the kitchen, but somehow the photographs and writing seemed to get put on hold as the chaos of Christmas took over. Why do we do it to ourselves? I only just feel like I've recovered from the annual stress-fest. If I'm really honest, I don't enjoy Christmas as much now that I have children. Not until the day arrives, when the last present is wrapped, the last homemade, glittery and still sticky card delivered, and I can finally sit back and enjoy my children enjoying Christmas. I shouldn't be complaining as this year I didn't even have to do the cooking as my lovely friend Tors invited us, along with my Mother-In-Law, for Christmas Day. She cooked up a storm, and I bought along a few puddings, including a chocolate log which took me 3 attempts to get right ( I think the last time I made anything similar was a swiss roll at school, which I found equally tricky).

I thought I'd start off my 2011 blogging with something much simpler - homemade pasta. I couldn't have told you what was in pasta until I first made it with a group of children and realised just how easy it is to make.  Plain egg pasta is made from 2 ingredients, flour and eggs.  Much quicker to make than homemade playdough, twice as tasty and not nearly so messy. If your children are anything like mine pasta is a regular visitor to your table, so making your own is well worthwhile.


1. Weigh out 100g flour with your child (this amount will serve 2 children for lunch). I use Doves Farm Pasta Flour, but plain white flour will do the job.

2. Help your child to break 1 egg into a small bowl.

3. Get your child to scoop out a well in the flour.

4. Let your child pour the egg into the well. Ask them to start stirring, and the dough will start to look like big breadcrumbs.

5. Gather the dough together and give it a quick knead, then hand it over to your child and let them have a go at kneading.

6. If you get into making pasta it is well worth buying a pasta machine, the one in the photographs I bought for my husband as a not very subtle hint last year - it worked, he's made us some great pasta.  However there is no need for a machine.  For tagliettelle simply roll out the dough with your child, as thin as you can, fold over, then roll again. Once you have got it nice and thin, cut it into long strips. It doesn't matter what it looks like, it matter how it tastes, and it will be delicious - especially with the homemade pesto I wrote about last year on the blog.

7. You can hang the pasta to dry it, I had to keep ours up high  as the children kept coming along and trying to steal it to eat raw. I'll never see what children see in raw pasta, mine happily crunch away on the packet stuff like its a bag of crisps.

Tuesday, October 12, 2010

Two little cooks

My little girl had one of her favourite friends over to play recently and they had great, messy fun together cooking bread. It got me thinking about friendships and cooking, and remembering some of the lovely times I have had preparing food and eating with friends and family. There is something about making food with someone that bonds you, especially if it is a new aquaintance - and being roped in to help prepare something can often make someone feel welcome.

 I worked on a Kibbutz whilst I was at University, and had to prepare breakfast for hundreds of hungry workers. There was a woman of 80 who still worked in the kitchens. The Kibbutz ideology means that people work until they drop, which considering the amount of very able older people there were on my Kibbutz, is probably a sound one. This old lady couldn't speak a word of English, and my Hebrew didn't stretch much further, but somehow, sharing the experience of boiling hundreds of eggs and cutting up countless red peppers (yes, for breakfast!) gave us a bond and somehow let me enter her world a little bit.

She had a tattoo on her arm that she had gained in a concentration camp, and had been one of the early immigrant settlers in dusty, difficult Israel - our worlds could not have been further apart in so many ways, but I will never forget her (perhaps also because she almost burnt down the dining hall down by spraying an electric toaster with a hosepipe, but that, as they say, is another story!)


Anyhow, this is the 'after' picture  - lots of fun, flour and bonding!


Quick bread
This isn't so much a bread as a giant scone. Its so easy and quick, a perfect wet afternoon activity.

Ingredients for 2 'loaves'

225g self raising flour
50g cold butter, cut into pieces

150ml milk

25g  dried fruit - apricots, raisins, currants, blueberries,

A handful of seeds - pumpkin, sunflower, poppy, sesame or linseed


1. Preheat the oven to 200C / 400f and tell your child that it is hot.

2. Weigh out 225g flour into a bowl.

3. Weigh out 50g butter together and cut into small pieces.

4. Show your child how to gently 'squeeze' the butter and flour together until it resembles breadcrumbs.

5. Weigh out 25g mixed fruit and add to the mixture.
6. Let your child pour 150ml milk into the mixture, then stir. If its dry, add a little more.

 7. Show your child how to make a ball from the dough and let them have a play with it.

8.  Break the dough into 2 pieces and then make into 'footballs'

9. Put the balls on a baking tray.

10. Give your child a pastry or paint brush and a little milk, let them paint the top of the balls.

11. Now let your child decorate the balls with the seeds

12. Bake in the oven for 15 - 20 minutes.


Sunday, September 26, 2010

To market to market...

We've been to the famous Stroud Farmers Market this weekend. A cold, crisp autumnal morning somehow feels like the perfect backdrop for a British market. I came away wondering why there aren't more places like this to buy food - somewhere to hang out, to bump into friends, to listen to music (our lovely neighbour John was there playing his fiddle).


Anything that makes the shopping experience more fun is a winner in my book. I don't know about you but since I have become a parent I have found that shopping and thinking about what to buy and cook is a relentless task, one that I often dread.
The smells, the colour, the noise - you don't get that in a supermarket, and I can't remember the last time Tescos was handing out free organic carrots for children to chomp on.  We had a (second) breakfast of bacon baps - stuffed with a lot of delicious bacon, not just the odd measly grey strip. The children were a bit chilly to start, but once I had bought some hats (what an unprepared mother!) they started to enjoy themselves, and were soon loving the sights and sounds of the market and running around chasing their little friend Rufus.

We bought some quinces for Grandma to make some Quince jam, then it was back to Matt and Sarahs' house for a lovely lunch, entirely sourced from the market.


The market is now being held every Saturday morning from 9am, get there early for the best produce, and DO try one of the bacon baps.


Let me know if you buy your food somwhere unique. Also, do your children enjoy the supermarket experience, or do you dread every trip? I'd love to have your comments.

Friday, September 24, 2010

Mermaid tea party

I'm not one for making pizza faces or hedgehog bread. However a little bit of imaginary play with food can come in very handy. My eldest daughter has never allowed a piece of tuna to pass her lips, and has declared many a time that it is 'be-gusting.' Luckily she has a very active imagination, so when we had a mermaid tea-party recently, she joined in with gusto and tried her tuna pasta first time - even finishing the bowl. When I asked her if she liked tuna now, she said 'only mermaid tuna'!


Friday, August 27, 2010

It's about time we had some babies on here, and my friend Lara's triplets make the perfect models! Gwennie, Mae and Leo are just over a year and are very busy little bees, investigating everything in their path. Its the ideal time to get babies exploring ingredients and it can help keep them busy whilst you are doing the cooking.


The more familiar children get with food and start to recognise what it is, the happier are to try it.
Choose strange shapes or funny textures, or fruits and vegetables that have a strong smell.


I don't need to tell you not to give them anything they could choke on - they will probably have a go at putting the food in their mouths, so give it a quick wash before you let them loose.

Wednesday, August 18, 2010

Superjam!

I was over the moon last week to learn about the publication of 'Superjam'. The author, Fraser Doherty, started selling jams as a teenager in Scotland, and now sells a range of delicious Superjams made with fruit juice instead of sugar and using nutritious ingredients such as blueberries and cranberries.

I've been wanting to make jam with the girls but was put off by the huge amount of sugar necessary. So, copy in hand, and in anticipation of a wet afternoon with my children and 2 of their friends to entertain, I decided to launch our jam making careers with the Stawberry and Pomegranate jam.


The children had fun preparing the ingredients and I boiled up the jam whilst they were having a bounce on the trampoline (luckily the rain stayed away). We did the test recommended by Fraser of running jam onto a cold plate to see if it set, and then I poured it into jars with labels decorated by the chidlren.


I couldn't believe how easy it was, even with 4 children. The book explains all the stages, in simple terms. The hardest bit was finding grape juice, but we tracked some down to Tescos who keep it in stock.


5 first-time jam makers were very pleased with their achievement and the jam tastes delicious. I can't wait to make the lemon curd, the orange and passion fruit marmalade and the plum and elderberry jam using the berries from our garden. Watch this space!

Tuesday, August 10, 2010

ROCKETS (Sweetcorn)

Sweetcorn cobs make a great 'toy' for young children, especially on a wet day like today. You could explain that as it's been a lovely hot summer the corn has grown nice and juicy and fat and ready to eat, and that this is the best time to eat sweetcorn as it is in season. Hopefully the video gives you an idea of how much fun can be had with 2 children and a couple of cobs.....

If it's still raining after lunch, you could teach your children about the other ways sweetcorn is eaten. A tin from the cupboard, frozen corn (mine love eating it like little yellow lolly pops) and the old favourite, popcorn.


Rainy day popcorn

Popcorn is so simple to make at home, you don't need a fancy popcorn maker, just a saucepan with a lid.

You will need:

100g popping corn
2 tablespoons of sunflower oil
50g butter
50g honey

1. Heat the oil on a medium temperature, and drop in one kernel as a tester. When it pops, the oil is ready.

2. You will want to keep your child well back for the popping, but explain what you are doing. Tell them to listen out for when the popping stops. Pour all the corn into the saucepan, put on the lid, and shake occasionally to keep the corn popping.

3. When the popping has finished, get your child to help you weigh out the honey and butter, and then put it in a saucepan and melt together.

4. Pour the honey and butter over the popcorn and divide into 4 bowls. You'll have at least 10 minutes peace whilst happy children munch.

For a delicious savoury version, melt 50g of butter with 10g of marmite (use more marmite if your children like a strong marmite taste.) Stir through popped corn.

Wednesday, August 4, 2010

p...p...p...Pesto

I recently heard Pesto described as the new ketchup. This is due to it's ability to encourage even the most reluctant child to eat-up as long as it is smoothered in the green stuff. It couldn't be simpler to make your own with your child, and it will mean that you are avoiding the extra salt and additives that the branded jars contain.
You will need
25g of basil (washed)
1 clove of garlic
50g of pinenuts
50g parmesan
100ml of olive oil

1. Let your child pick the basil leaves and put them into a bowl.
2. Now show your child how to peel off the garlic skin and let them have a go. Add to the bowl.
3. Weigh out the parmesan together and then let your child grate it into the bowl.
4. Weigh out the pinenuts together and add to the mixture.
5. Measure out the oil together and add to the other ingredients.


6. It's as simple as that. Now, using a stick blender or mixer, whizz everything together. Explain to your child that mixers are dangerous but you could let them turn the button on themselves.

Store in the fridge, it will keep well for about 10 days.


We eat pesto with everything, smeared on a chicken breast, stirred into basmati rice or baked on top of a salmon fillet. When you make your own it will be bursting with vitamins, store some good protein in the pinenuts and there are antioxidants in the garlic . So, stirred into pasta with a couple of peas thrown in for good measure, it's a meal in itself. Round of applause for the green stuff!

Friday, July 30, 2010

Beach biscuits

The holidays are here, so its time for easy-to-cook-food. Slow energy sources like oats are the perfect snack for children running around at the park, on the beach or whizzing around on bikes.
These biscuits are easy to make with your child and will last for several days in an airtight container. The ingredients are measured in mugs (just use a standard size coffee mug) so they are ideal for making in a caravan or self catering cottage.


And if the weather breaks...these are equally good eaten in a den under a quilt on a rainy day. Enjoy!


You will need:


125g butter (½ a packet)
¼ mug of runny honey
2 mugs of porridge oats
½ mug of self raising flour
zest of 1 orange (or 1 tablespoon of orange juice)

Preheat the oven to 180C and tell your child that it is hot


1. Help your child weigh out the butter and honey, then melt them in a saucepan over a low heat - let your child watch the melting but warn them it is hot.

2. Weigh out the oats and flour into a bowl with your child, then stir in the butter and honey mixture.

3. Show your child how to zest the orange, then let them have a go, watching they don't grate their little fingers. Add to the mixture.

4.  Show your child how to make the biscuits – form little balls of mixture and then squash gently onto a baking tray. Then let them do it - don't worry if there are lots of different shapes and sizes!

5.  Bake for 8 -10 minutes and cool before eating.

Saturday, May 8, 2010

Dinosaur Dough (Rrrrrrr!)

I had lots of fun cooking at our local preschool this week - their theme was dinosaurs, so I made some 'dinosaur dough'. I shaped the dough  into dinosaur eggs and the children rolled it out and then cut out Tyrannosaurus and Stegosaurus shaped biscuits.

For decoration there were pumpkin and sunflower seeds for the spikes and pomegranate seeds for scary red dinosaur eyes. Lots of the children enjoyed tasting the seeds as they decorated the dinosaurs, and the finished biscuits looked great.


Dinosaur Dough

You will need:
115g butter
200g honey
Self raising flour
1 tablespoon of ground ginger
1 egg


Preheat the oven to 160c and tell your child that it is hot

1. Melt the butter and honey together in a saucepan over very a low temperature.
2. Weigh out the flour with your child into a mixing bowl and let them measure the ginger into the bowl.
3. Let your child make a 'well' in the flour and ginger, digging with a tablespoon.
4. Now help your child to break an egg into a bowl and whisk it.
5. Let your child watch your pour the butter and honey mix and the egg into the well, then stir a few times yourself before handing over to your child.
6. Bring the dough together and then turn out onto a surface with a little flour.
7. Show your child how to gently knead the dough until it comes together into a nice ball.
8. Get your child rolling and cutting out shapes.
9. Decorate with pomegranate seeds, pumpkin seeds and sunflower seeds - encourage them to try the dinosaur spikes and red eyes as you go, its amazing what they will try when it is play!
10. Bake for 15 minutes until golden